Trial lesson
First musical discoveries
A trial lesson for a child ages 2–3 and an adult
What will we do?
Today we’ll visit the Kingdom of Tune, get to know the musical pictures, practice moving our fingers and explore the cards, listen to music, and try playing ourselves.
You can spread this lesson over several short sessions. Continue while your child is interested.
Start with the Technology Lesson
Open Getting to Know Soft Mozart: explore the program, find the modules and your results, learn how to choose a student’s name, and connect your instrument. Then return to this lesson.

All learning materials are included in this trial lesson and are free to use. You’ll find the book, hands picture, cards, and animated song beside the activities that use them. There’s no need to find or buy them separately.
Begin on a device that suits you—a computer, tablet, or smartphone. To play on a real keyboard, you’ll need a MIDI connection. The Technology Lesson shows you how to set it up.
Choose a section. Select its title to open the activity.
1. Teaching approach: your role in your child’s learning
Try the activity yourself first. Let your child watch and join in.
Why this matters
You don’t need to test whether your child has talent or “musical ability” before starting. We create opportunities for children to learn to look, listen, focus, and act.
In every part of the lesson, from exploring the story to playing the keys, your child takes part: noticing a symbol, hearing a sound, and responding with movement or voice. Gradually, they learn to sustain attention and connect what they see and hear with what they do.
Your role is to spark interest through your own example, allow time for an attempt, and help when your child asks. You don’t need a musical education: learn the activities alongside your child. Stay nearby without hovering or stepping in at every turn.
Each student has their own name and results
Before your child begins, choose their name in My Learning. If it isn’t listed yet, add it. Select Start Session. For your own attempts, choose your own name so your results stay separate from your child’s.
After the session, open My results. Compare your child’s results with their earlier attempts at the same activity to see how they are progressing over time.
What to do
- Explore the activity yourself first. Try playing, singing, or laying out the cards. Let your child see your interest.
- Give your child a chance to watch and join in. Speak calmly and keep instructions short.
- Offer a little at a time, while your child is interested. Let their interest guide how long you spend and when you return, rather than following a rigid schedule.
- Watch your child: if they are tired, turn away, or become upset, stop. You can return to the activity later.
- Notice specific actions: “You found the key yourself!” or “You waited for the Butterfly!”
- Record early attempts at each kind of activity on video. Keep the dates and results: this is the story of your child’s first steps.
What not to do
- Don’t try to gain attention through persuasion, repeated questioning, or demands to “Sit down and listen.”
- Don’t hurry your child or do something for them while they are still trying to learn it.
- Don’t insist on completing every activity in one sitting or immediately repeating a success.
- Don’t compare your child with other children or judge their abilities from a first attempt.
- Don’t turn learning into a performance for visitors or the camera. Don’t ask for another take just to make a perfect video.
A common difficulty
“I prepared everything, but my child doesn’t want to join in.”
Begin yourself: open the book, lay out the cards, or try playing. Give your child time to become interested. If today they only watch, don’t force them to participate.
What to notice
Your child comes closer to watch, listens, reaches for a card, tries pressing a key, or returns to an activity. Notice what they do independently and what help they need.
Keep a record of the beginning
In our experience, parents often notice changes so quickly that they wish they had recorded the earliest attempts. Record and save ordinary attempts, including pauses and difficulties. Later, these will help you see how far your child has come. You don’t have to publish the recordings.
The guiding principle
Your interest invites your child to join in. Your patience gives them room to learn.
2. Kingdom of Tune: the story, book, and Guess Key
What is the Kingdom of Tune?
In the Kingdom of Tune, each character represents a scale degree.
In music, notes relate to one another. In major and minor keys, they have particular roles and relationships. The Kingdom of Tune brings these relationships to life through the characters and events of the story.
Your child is discovering how the language of music works, as well as meeting individual notes. This lays a foundation for tonal hearing—the ability to hear relationships between notes. Later, it supports playing melodies by ear, finding harmonies to accompany them, and transposing music into other keys.
The Time to Learn! book
This is a book to look at, read, and color together. Pay particular attention to the note symbols: they connect the story’s pages and characters with the keyboard.
Open the book and begin exploring it yourself. When your child joins you, show the pictures and read. Notice the pictures on the doors: Door—Do, Rain—Re, and Mirror—Mi. Your child will meet these same pictures on the guides behind the keys and in the program.
Don’t set a quota of “one page a day.” Look, read, and color for as long as your child is interested. Return to a favorite page or explore further.
From the book to the game

The module is called Guess Key. Remember its name and icon: they will help you find the activity.
Your child meets familiar symbols and characters in the game. Now they can find the corresponding key, press it, and hear its sound.
Before the first game: choose your name
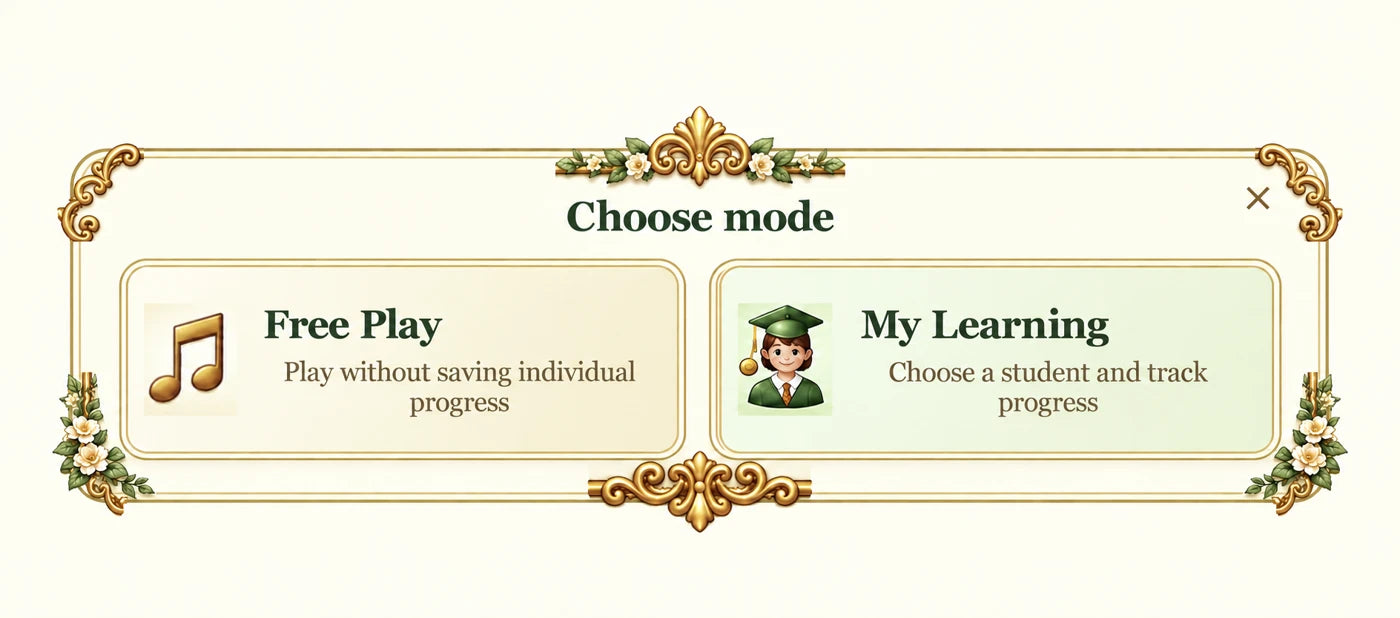
For these activities, choose My Learning: this lets you use your own name and track your results. Free Play lets you explore without saving individual progress.
At Tonic’s house, choose your own name and select Start Session. When it’s your child’s turn, return to Tonic, choose their name, and start their session. Then open Guess Key again.
Getting started with Guess Key
How to find it: open the demo → at Tonic’s house, select Modules → at Mr. Oops’s house, choose Guess Key → select the green start button.
- Press F1 first for instructions and controls. Try the activity yourself.
- Before your child’s turn, check that the screen shows their name.
- Begin with the first section. Each demo attempt gives you 45 seconds of game time.
- Let your child look at the symbol, find the corresponding key, and press it themselves. You can stay nearby and name familiar pictures.
Don’t press the keys for your child.
The game responds to the player’s actions. If you press keys for your child, the program records your actions as their result. The points your child earns independently are their own.
An attempt in the demo lasts 45 seconds of game time. If your child is tired, you can stop sooner.
If there are too many keys
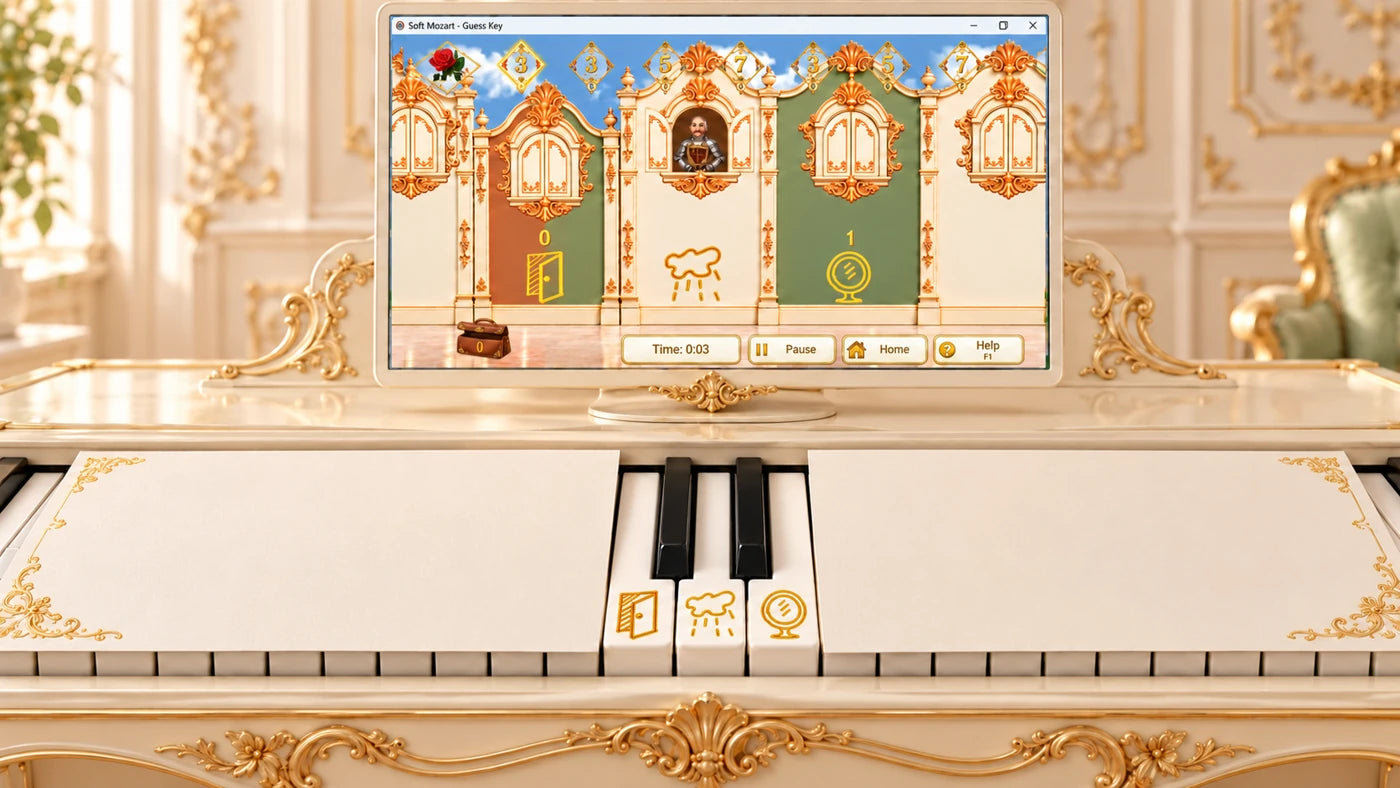
Make the keyboard easier to scan: cover the part you don’t need yet with paper or cardboard, leaving a few relevant keys visible. The illustration leaves Do, Re, and Mi uncovered. The covering must not press the keys or restrict their movement. Uncover more keys as needed.
What to notice
Your child notices a familiar symbol, looks at the keyboard, finds a key, and presses it independently. What matters is the connection between what they see, hear, and do.
After the game
Open My results. Compare your child’s result with their earlier attempts at the same activity to see how they are progressing over time. You can record the date and the points your child earned independently in your learning diary.
What not to do
Don’t guide your child’s hands, press keys for them, or demand a certain score. If they ask for help, point to a familiar symbol or remind them of its name, leaving the key press to your child.
3. Developing fine motor skills and coordination
Use the button above to download and print the hands picture. Place your hands over the picture and invite your child to do the same.
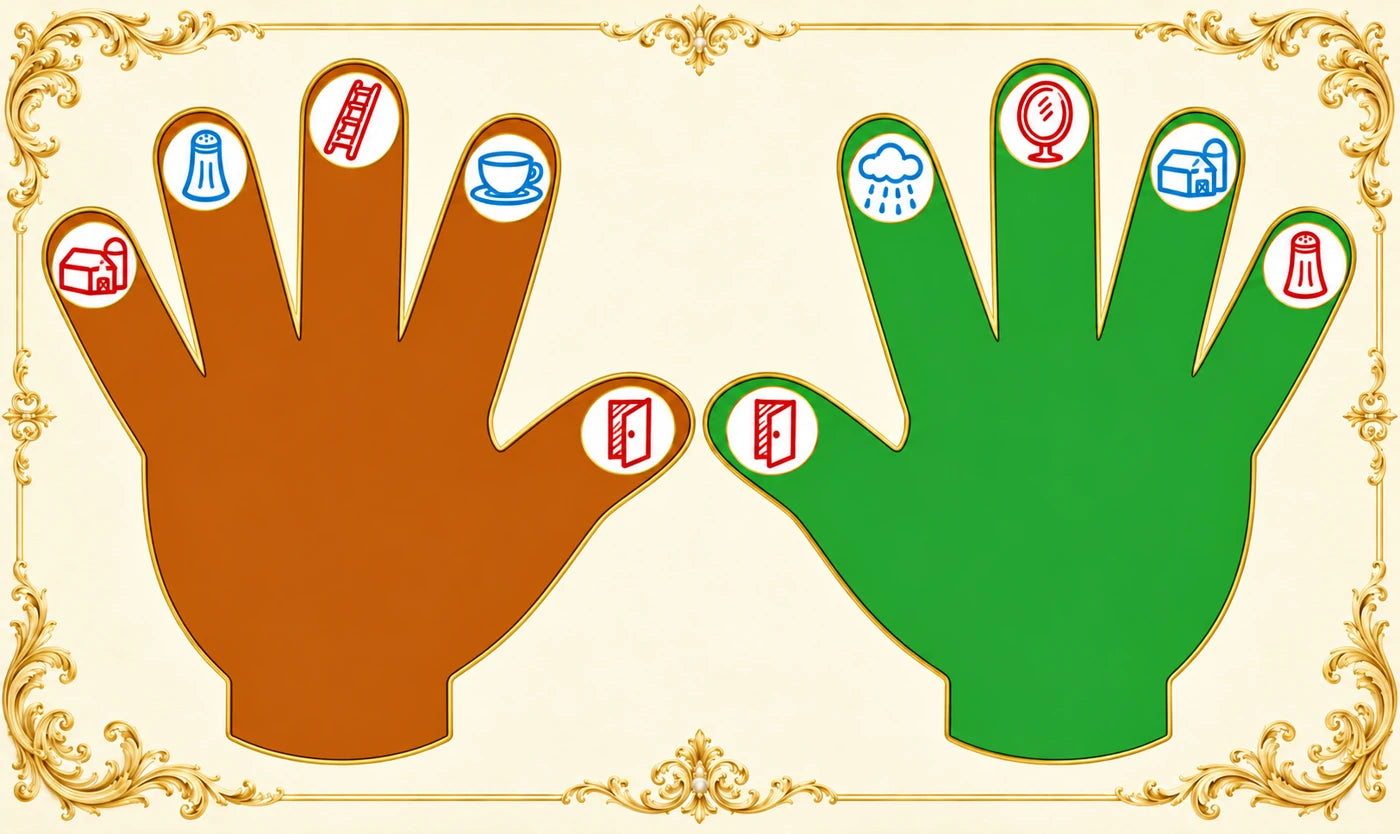
Getting to know our fingers
Each finger has a familiar note symbol on it. In this activity, the fingers have musical names.
| Finger | Right hand | Left hand |
|---|---|---|
| Thumb | Do—Door | Do—Door |
| Index finger | Re—Rain | Ti—Tea |
| Middle finger | Mi—Mirror | La—Ladder |
| Ring finger | Fa—Farm | Sol—Salt |
| Little finger | Sol—Salt | Fa—Farm |
What to do
Show your own hand first: “This is my thumb—Do.” Lift it and lower it. Then name the note and let your child try lifting the matching finger.
You can say or sing the note names. Start with the fingers that interest your child and continue while they enjoy it.
If it’s difficult at first
Show the movement again on your own hand. Give your child time to try. If neighboring fingers rise along with one finger, don’t hold them down or expect precision right away.
What to notice
Your child connects the name they hear, the symbol in the picture, and their own finger. They are trying to choose a movement and make it themselves.
What not to do
Don’t expect your child to lift every finger separately or remember all the names right away. Don’t turn this introduction into a test. Here we are exploring movement; there is no need to play a piece with all the fingers yet.
4. Music theory and ear training

Our characters in the C major scale
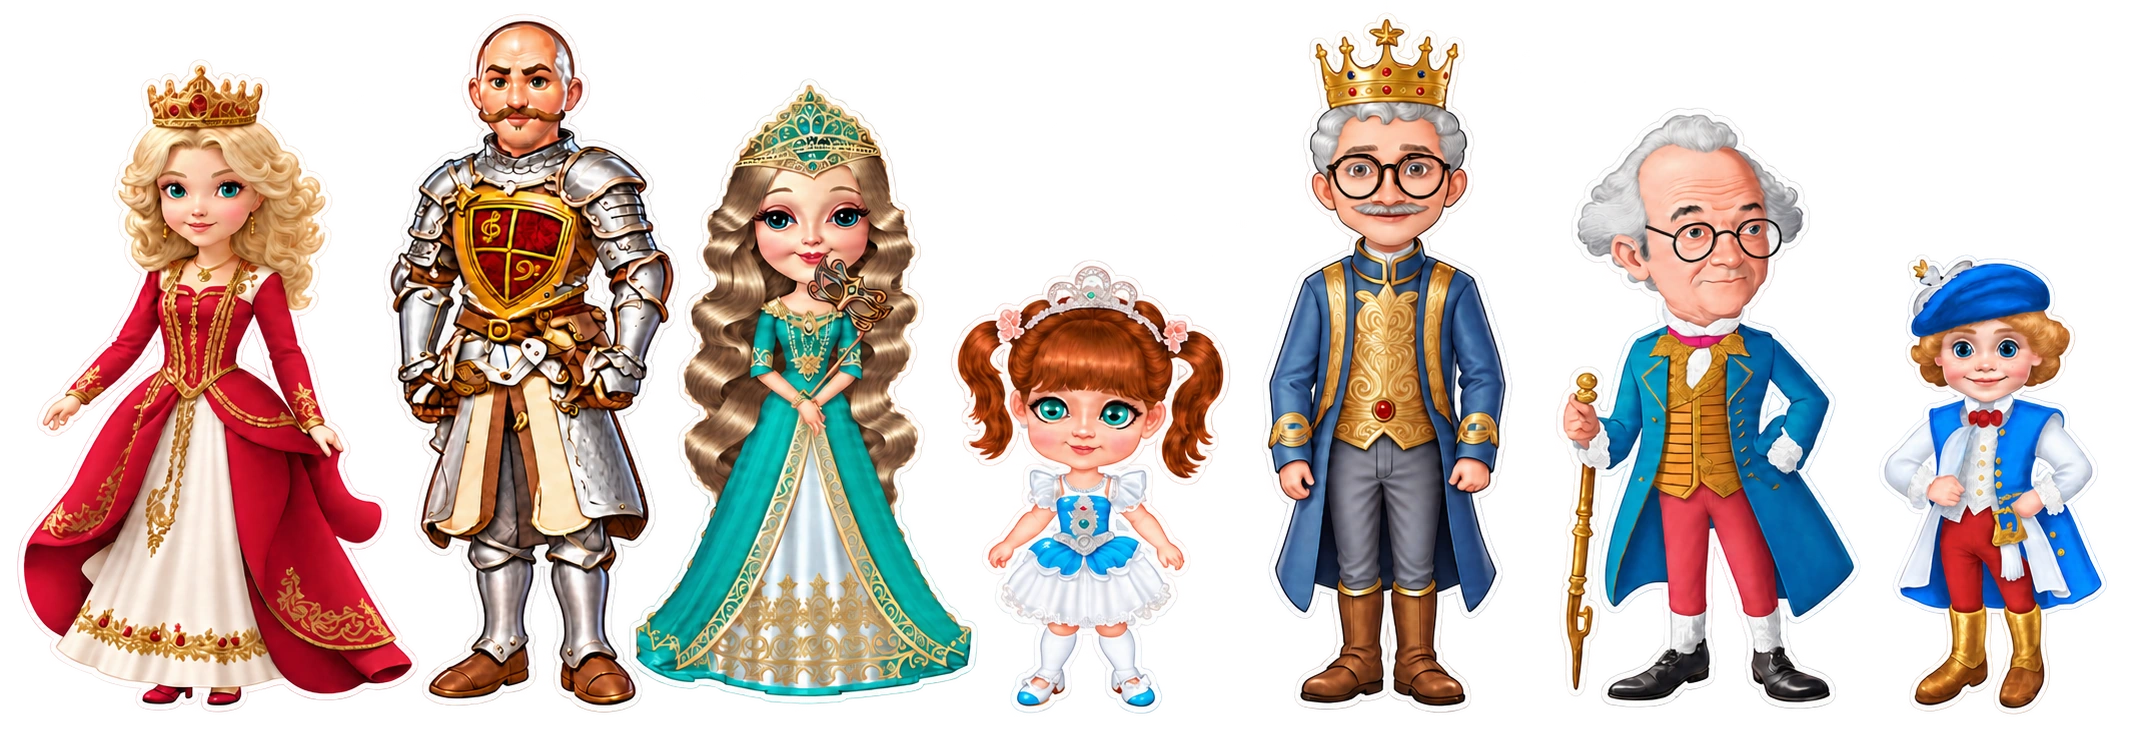
Play the animated song for English-speaking learners. Your child has already met the characters in the story and played with them in Guess Key. Now they’ll meet them in the C major scale!
There’s no need to memorize the characters’ names. Through repeated encounters, your child will gradually learn to recognize them in pictures and in music. Watch, listen, and sing along together!
Cards: from pictures to note names
Download the red and blue cards here. Choose the letter-name system you use: Ti can be written as H or B. The solfège names are the same in both sets.
Print the set you’ve chosen. An adult cuts out the cards. Work through the following steps gradually, as your child is ready.
Step 1. Meet the pictures
Show a card: “This is a door. The door is red.” Then introduce the rain and mirror pictures.
Lay out the cards and ask, “Give me the door card,” “Give me the rain card,” or “Give me the mirror card.”
For now, use the full name of each picture. Your child doesn’t need to choose by color at this step.
Step 2. Tell the colors apart
Once the pictures are familiar, lay out the red and blue versions: “Give me the red door,” “Give me the blue door,” “Give me the red rain,” and “Give me the blue rain.”
Step 3. Meet the note names
Connect each picture to its short musical name: “Door—Do,” “Rain—Re,” and “Mirror—Mi.”
Now ask, “Give me Do,” “Give me Re,” or “Give me Mi.” Either color is fine for now.
Step 4. Put note names and colors together
“Give me red Do,” “Give me blue Do,” “Give me red Re,” or “Give me blue Mi.”
Now your child chooses a card using two features: its note name and its color.
Next: the whole note sequence
As your child becomes familiar with the pictures, introduce the others: Farm—Fa, Salt—Sol, Ladder—La, and Tea—Ti.
The next goal is to put the cards in order: Do—Re—Mi—Fa—Sol—La—Ti—Do. You’ll need two Door cards for this.
Lay out the cards and sing along with the song. For a child ages 2–3, the whole sequence is something to build toward gradually, not a requirement for the first encounter.
If it’s difficult at first
Offer fewer cards. Show and name a familiar picture yourself. Return to a step your child understands, or put the cards away until they are interested again.
What to notice
Your child chooses a picture when you name it, then distinguishes its color, recognizes the note name, and gradually combines these features. They may listen to your singing, try joining in, and return to familiar cards on their own.
What not to do
Don’t begin by asking for the whole note sequence. Don’t jump straight to “red Do” while your child is still getting to know the door and the colors. Don’t expect them to choose a card, sing, and perform other actions all at once.
5. Playing the piano: Happy Birthday in Gentle Piano
Open Gentle Piano under your own name, press F1 first, then listen to Happy Birthday.
The adult goes first
In this section, you’ll prepare to support your child: learn the Gentle Piano controls, try the piece yourself, and learn how to choose an amount your child can manage.
How to find it: open the demo → at Tonic’s house, choose your own name in My Learning and select Start Session → Gentle Piano → Happy Birthday.
In Gentle Piano, press F1 first for the full list of commands. The S, L, and R keys below are on your computer keyboard. Play the music on your connected instrument.
Try this sequence
- Press S and listen to Happy Birthday.
- Choose presentation 1, then L for the left-hand part. The program will play the melody in the other part.
- Try playing the accompaniment yourself. Then, if you wish, try the other part and both parts together, following the F1 instructions.
- If the whole piece is difficult at first, choose a short section. You’ll find instructions for selecting a section and returning to the whole piece in F1.
Watch the thermometer

During your own playing, aim for the thermometer to stay mostly green. If yellow or red predominates, repeat the part or choose a shorter section. Give yourself time to become familiar with the activity. The Technology Lesson explains this indicator and visual-motor delay.
This measures how you perform a particular activity. Don’t use it to judge your child’s abilities. After playing, open My results. Compare your own attempts with one another, and your child’s attempts with their earlier attempts.
Your child’s turn
Before your child’s attempt, return to Tonic, choose their name in My Learning, and select Start Session. Open Gentle Piano → Happy Birthday again.
When to introduce the fingers of one hand
While the Gentle Piano thermometer is in the red or yellow zone, don’t ask your child to use particular fingers. Their attention is occupied with finding a key, pressing it, holding it, and letting go.
When the thermometer moves into the green zone, you can gradually invite your child to play with the fingers of one hand—right or left.
To make the keys easier to find visually, you can mark them with small round stickers or other clearly visible markers.
Begin with the left-hand part
Open the complete Happy Birthday piece, choose presentation 1, and select L. Your child can play the left-hand part with both hands, using the index finger of each hand.
This part uses the combinations B-flat and C, then F and C. Follow the notes in the program: help your child find their way, while leaving the key presses to them.
In a presentation with the focus line, show the sequence: press a key, hold it until the Butterfly appears, then release it. A short prompt is enough: “Hold… here’s the Butterfly—let go.” Let your child press, hold, and release the key themselves.
If your child wants to continue: the right-hand part
You can try the melody in R mode. Choose a short section your child can manage. When it becomes easier and they want to continue, extend the section or open the whole piece. The finger rule stays the same: don’t require particular fingers in the red and yellow zones; in the green zone, gradually invite your child to use the fingers of one hand.
Singing
You can name and sing the notes yourself. Let your child join in when they are comfortable. Don’t expect them to find a key, hold it, watch the screen, and sing all at once.
If it’s difficult
Shorten the section, return to a familiar part, or stop the attempt. Help when your child asks, while leaving the pressing, holding, and releasing of the key to them.
What to notice
Your child looks at the note symbol, finds a key, hears the result of their own action, and tries to hold the sound and release the key at the right time. Notice which actions they can already perform independently.
What not to do
Don’t press keys for your child, hurry them, or insist on the whole piece or both parts at once. Don’t make the activity harder just to achieve a result on the screen.
After the session
Open My results and compare your child’s attempts at the same activity to see their progress over time. Save ordinary attempts, including pauses and difficulties.
6. Musical culture and listening
Play the selected recording and listen with your child.
A familiar song, performed by musicians
Your child has already met Happy Birthday in Gentle Piano: they have heard it, tried playing it, or listened to you play. Now invite them to hear how other musicians perform the song.
Why this matters
This connects your child’s own musical experience with the wider world of music.
What to do
Before listening, say, “This is Happy Birthday. We played this song on the keys. Let’s hear how the musicians play it.”
Play the selected recording and listen together. You can sing along, dance, sway, or “conduct.” If your child wants to watch and listen quietly, let them.
Name the piece and its performers. Return to familiar music when your child is interested. You can introduce other performances gradually.
Listen to Stravinsky
Igor Stravinsky based his Greeting Prelude on Happy Birthday. The familiar song sounds different in this piece. Simply listen together, without expecting your child to recognize the melody right away.
Watch: the Oslo Philharmonic, conducted by Vasily Petrenko.
Listen without YouTube: the Columbia Symphony Orchestra, conducted by Igor Stravinsky. The complete 55-second recording is available on the publisher’s website, Boosey & Hawkes.
These are two performances of the same piece.
What to look for
Does your child listen closely, smile, move to the music, pick up the tune, or ask to hear it again? Notice these responses. They help you understand what caught your child’s interest.
What not to do
Don’t insist that your child sit still, listen to the end, or recognize the melody. Don’t turn listening into a test: “What is it? Do you remember?”
Continue learning with Soft Mozart
The next lessons will build on these first musical discoveries, helping your child learn to read and sing notes, play pieces, and hear and understand music—at their own pace, with your support.
You can learn independently or work with our certified teachers, online or in person. On our forum, you can ask questions, share progress, and connect with other families and teachers.
We hold concerts and assessments and nominate participants for medals and diplomas. These first attempts at home can be the beginning of a lifelong musical journey.
Join Soft Mozart—learn, share your discoveries, and grow with us!